Automations are currently in private alpha and only available to a limited number of users. APIs might change before GA.To use the methods on this page, you must upgrade your Resend SDK:
npm install resend@6.10.0-preview-workflows.3
Contact us if you’re interested in testing this feature.
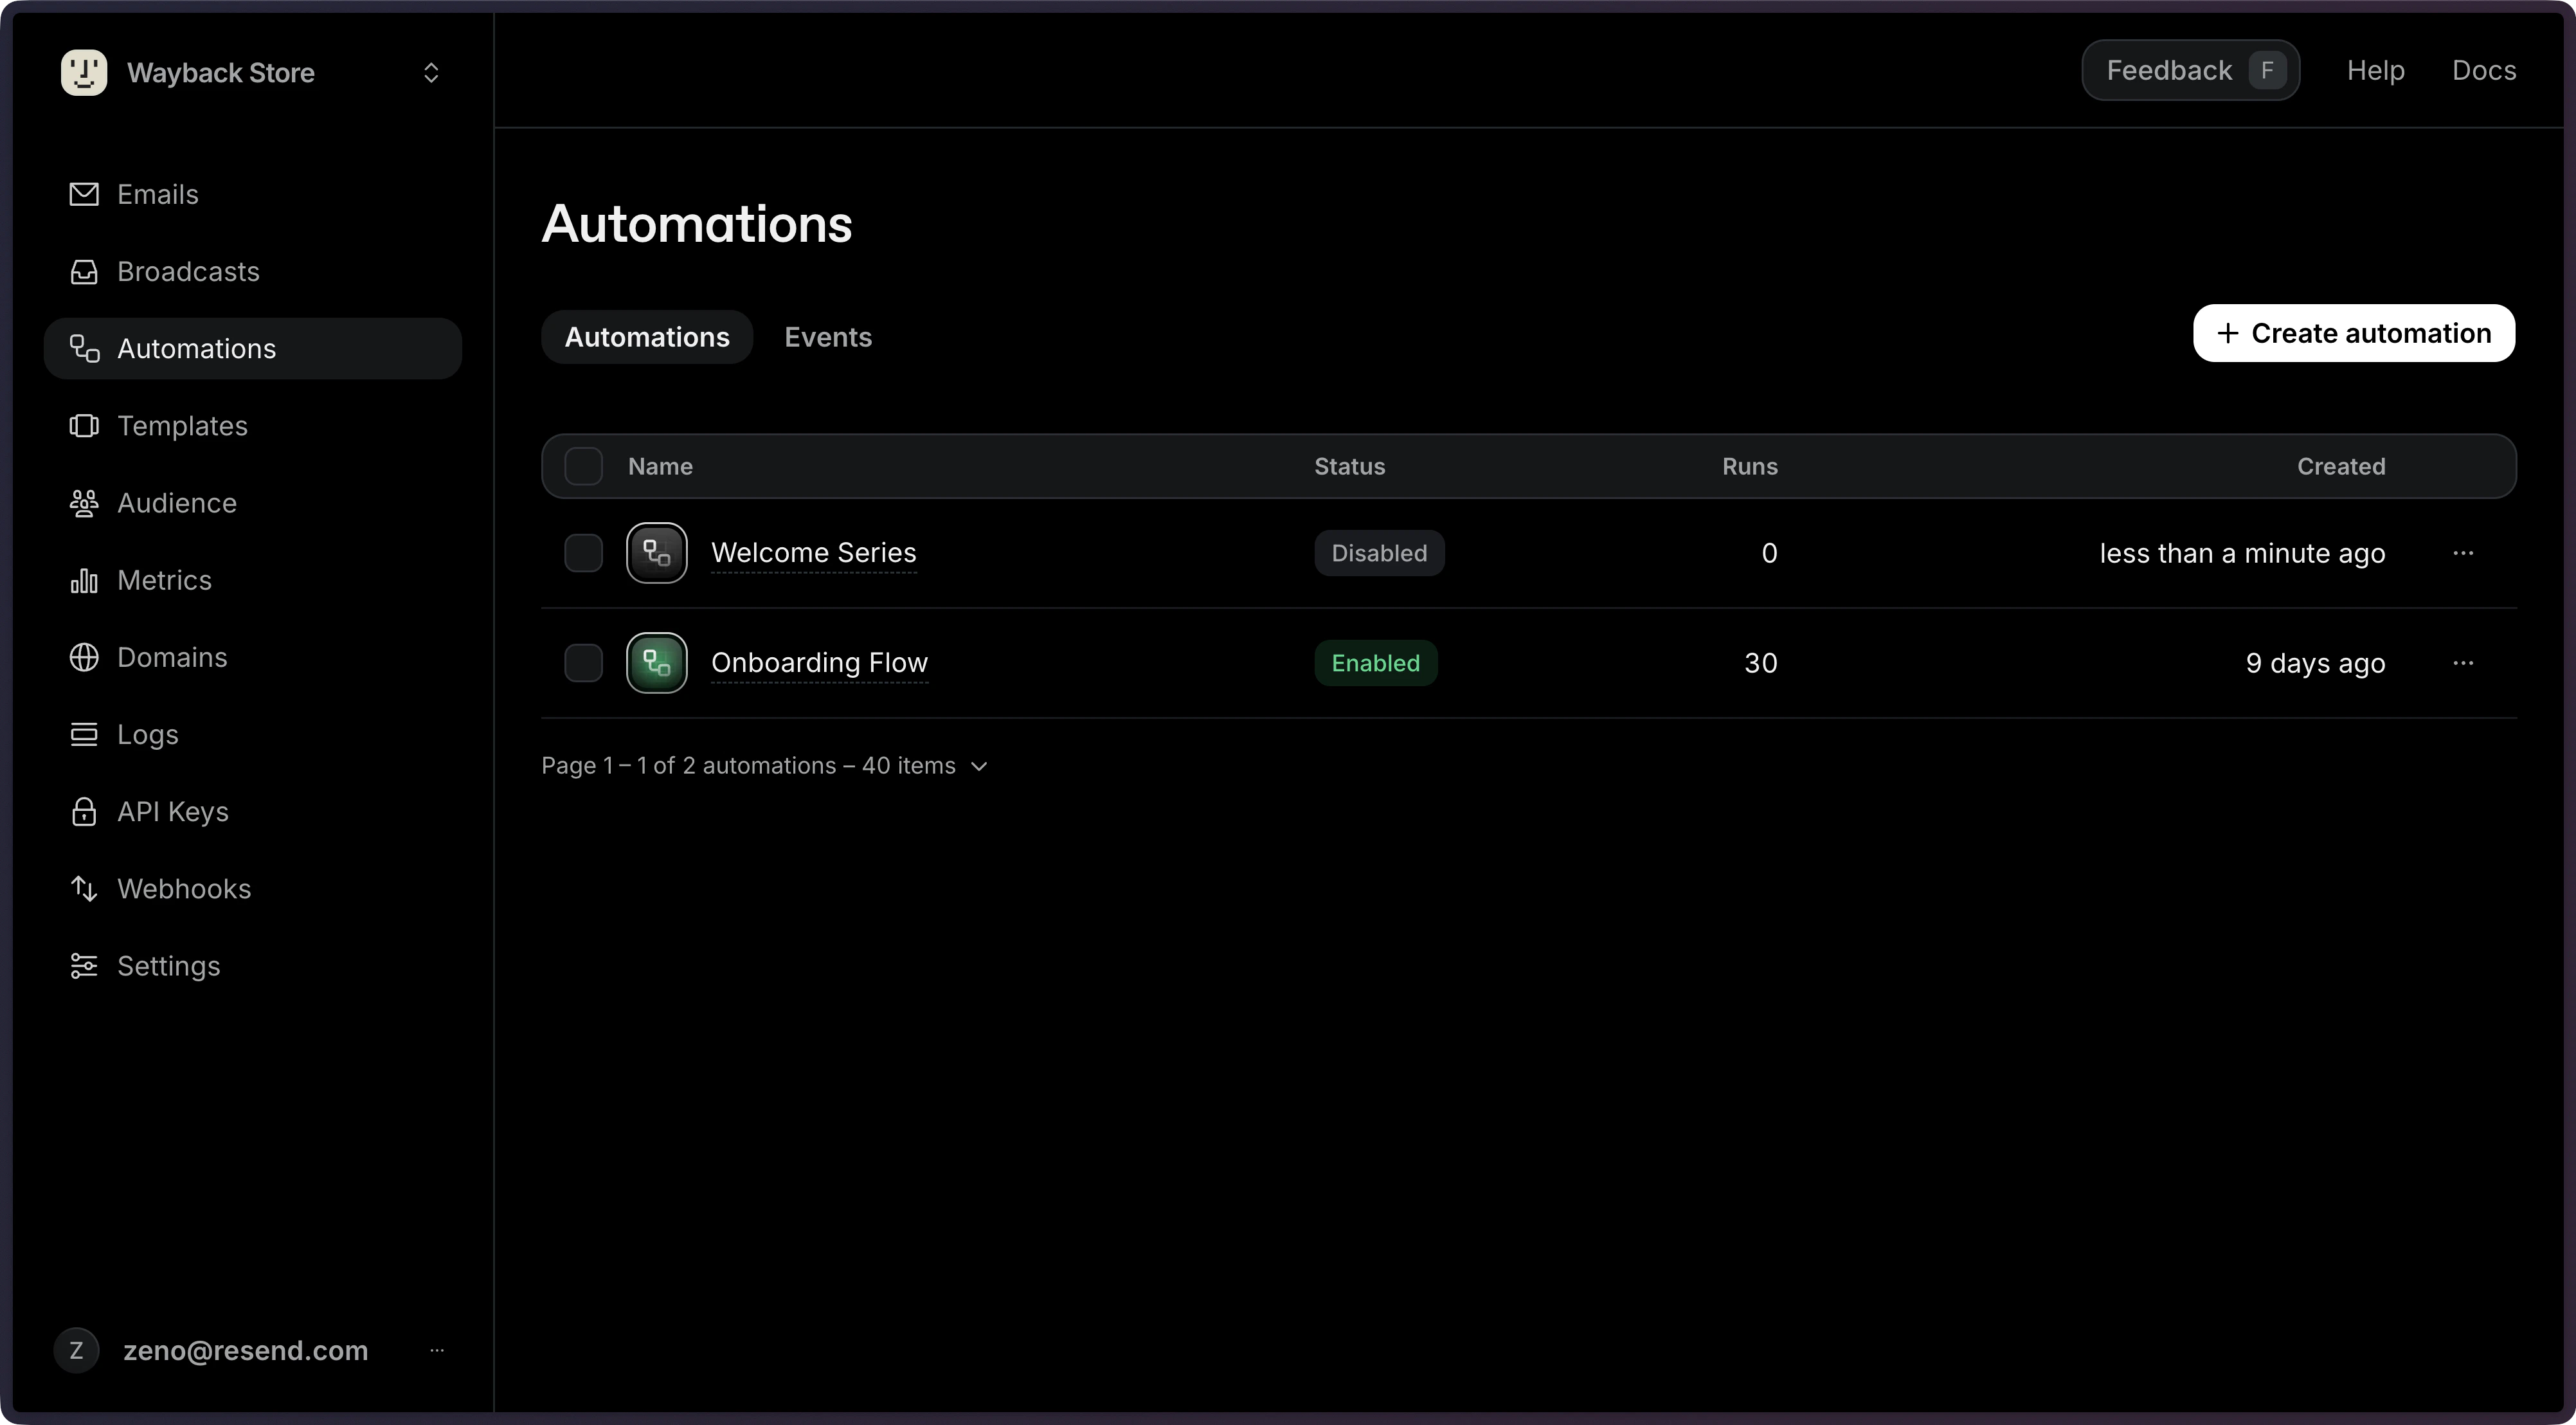
Automations allow you to create email steps based on custom events from your application. You can use Automations for use cases like:
  • Welcome emails
  • Drip campaigns
  • Payment recovery
  • Abandoned cart
  • Trial expiration

How it works

To start executing an Automation, you need to:
1

Create Automation

Outline the sequence of steps to be executed.
2

Add Trigger

Define the event name that will trigger the Automation.
3

Define Steps

Configure the steps to be executed.
4

Send an Event

Trigger the Automation by sending an event from your application.
5

Monitor Runs

Track and debug your Automation executions using runs.

1. Create Automation

The Automations page shows all existing automations.Click Create automation to start a new Automation.Create Automation

2. Add Trigger

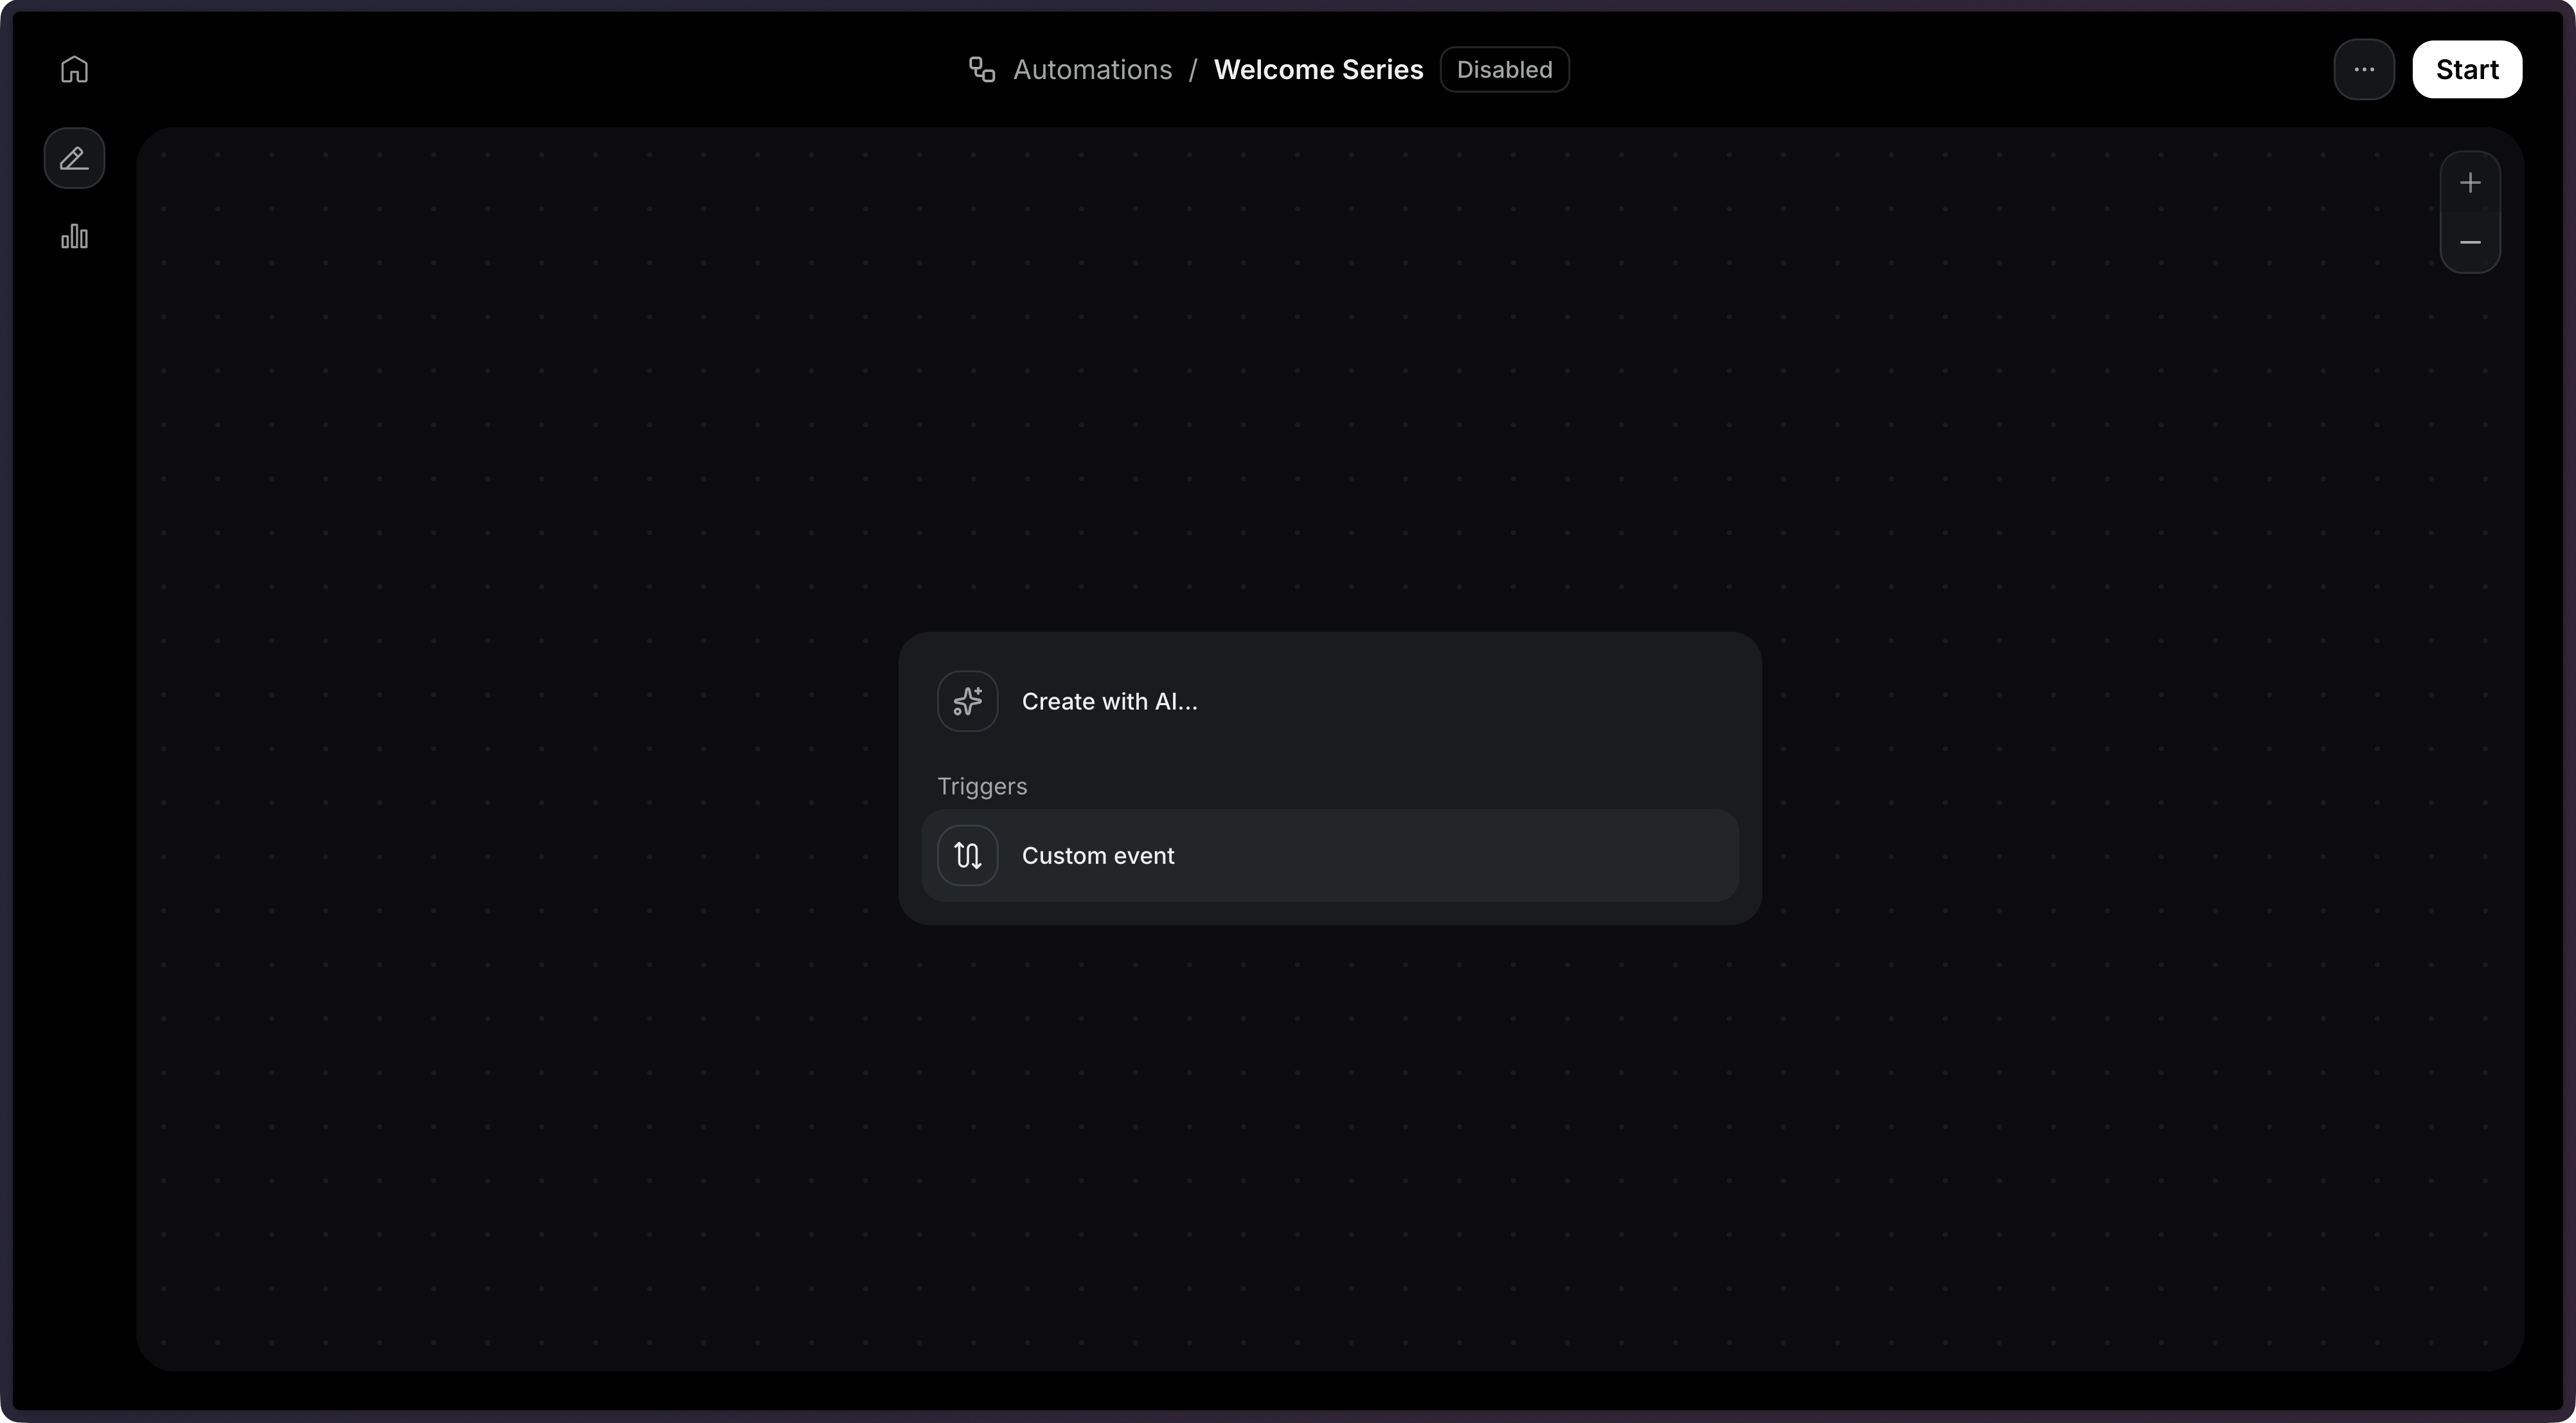
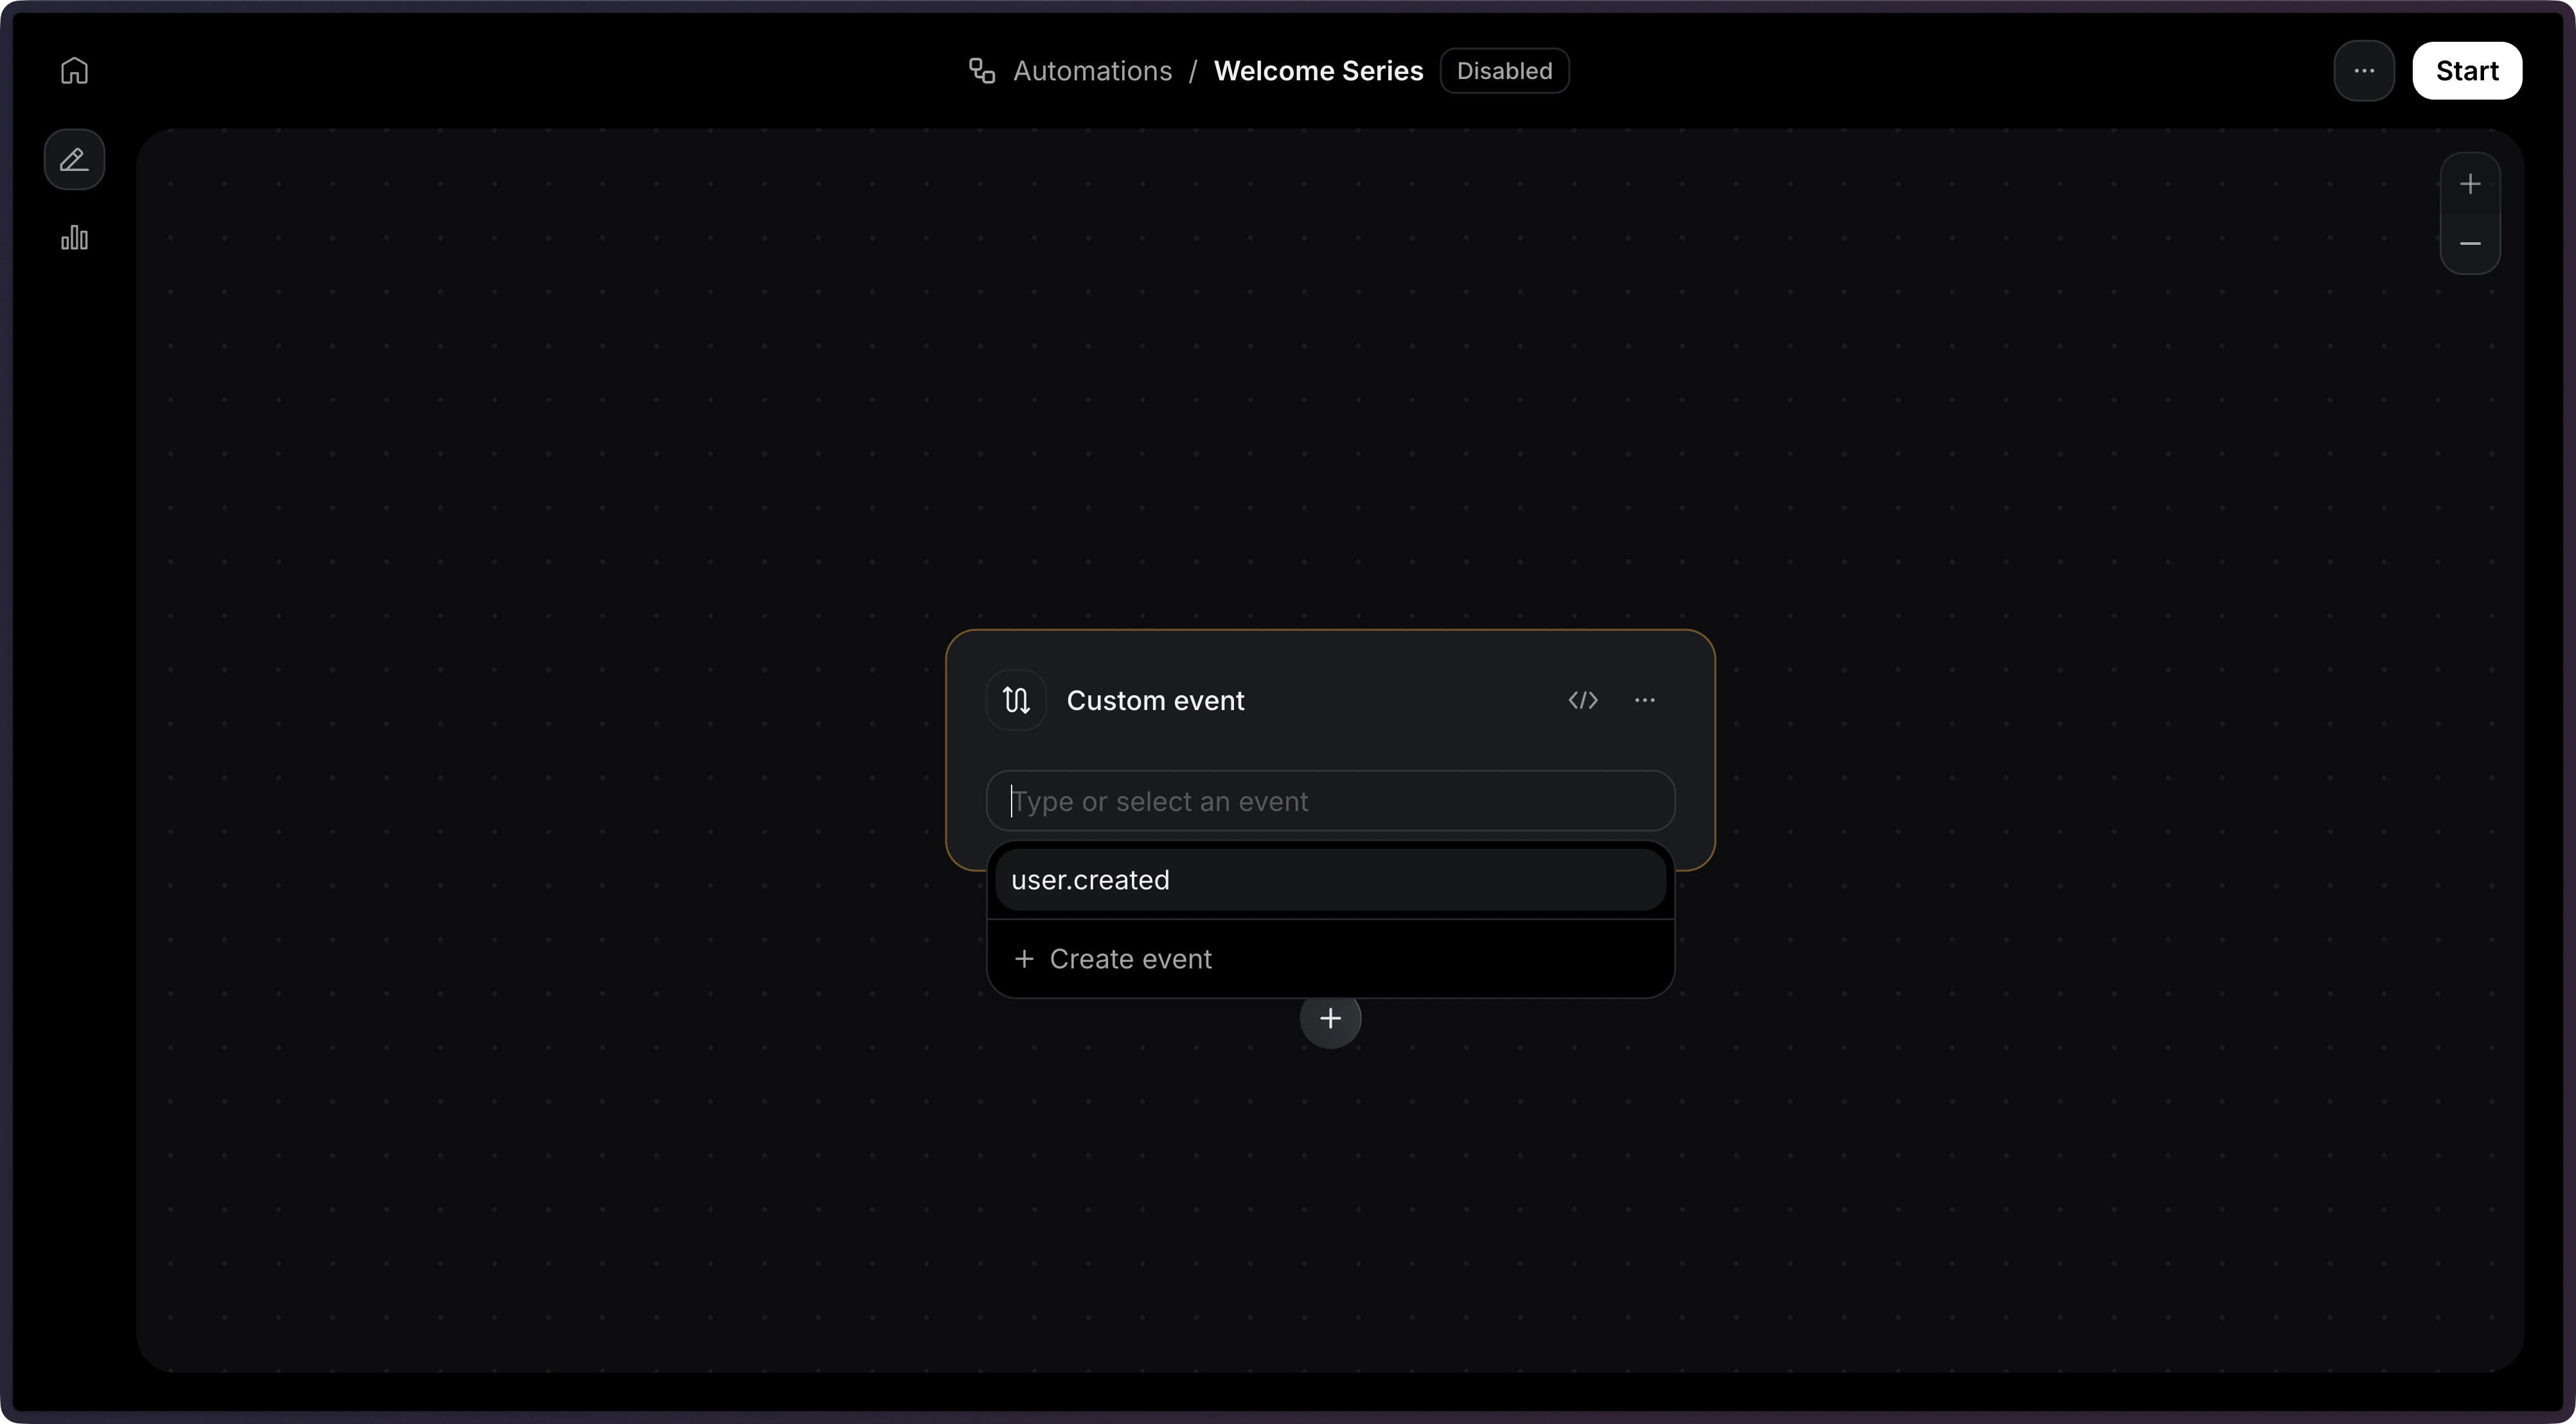
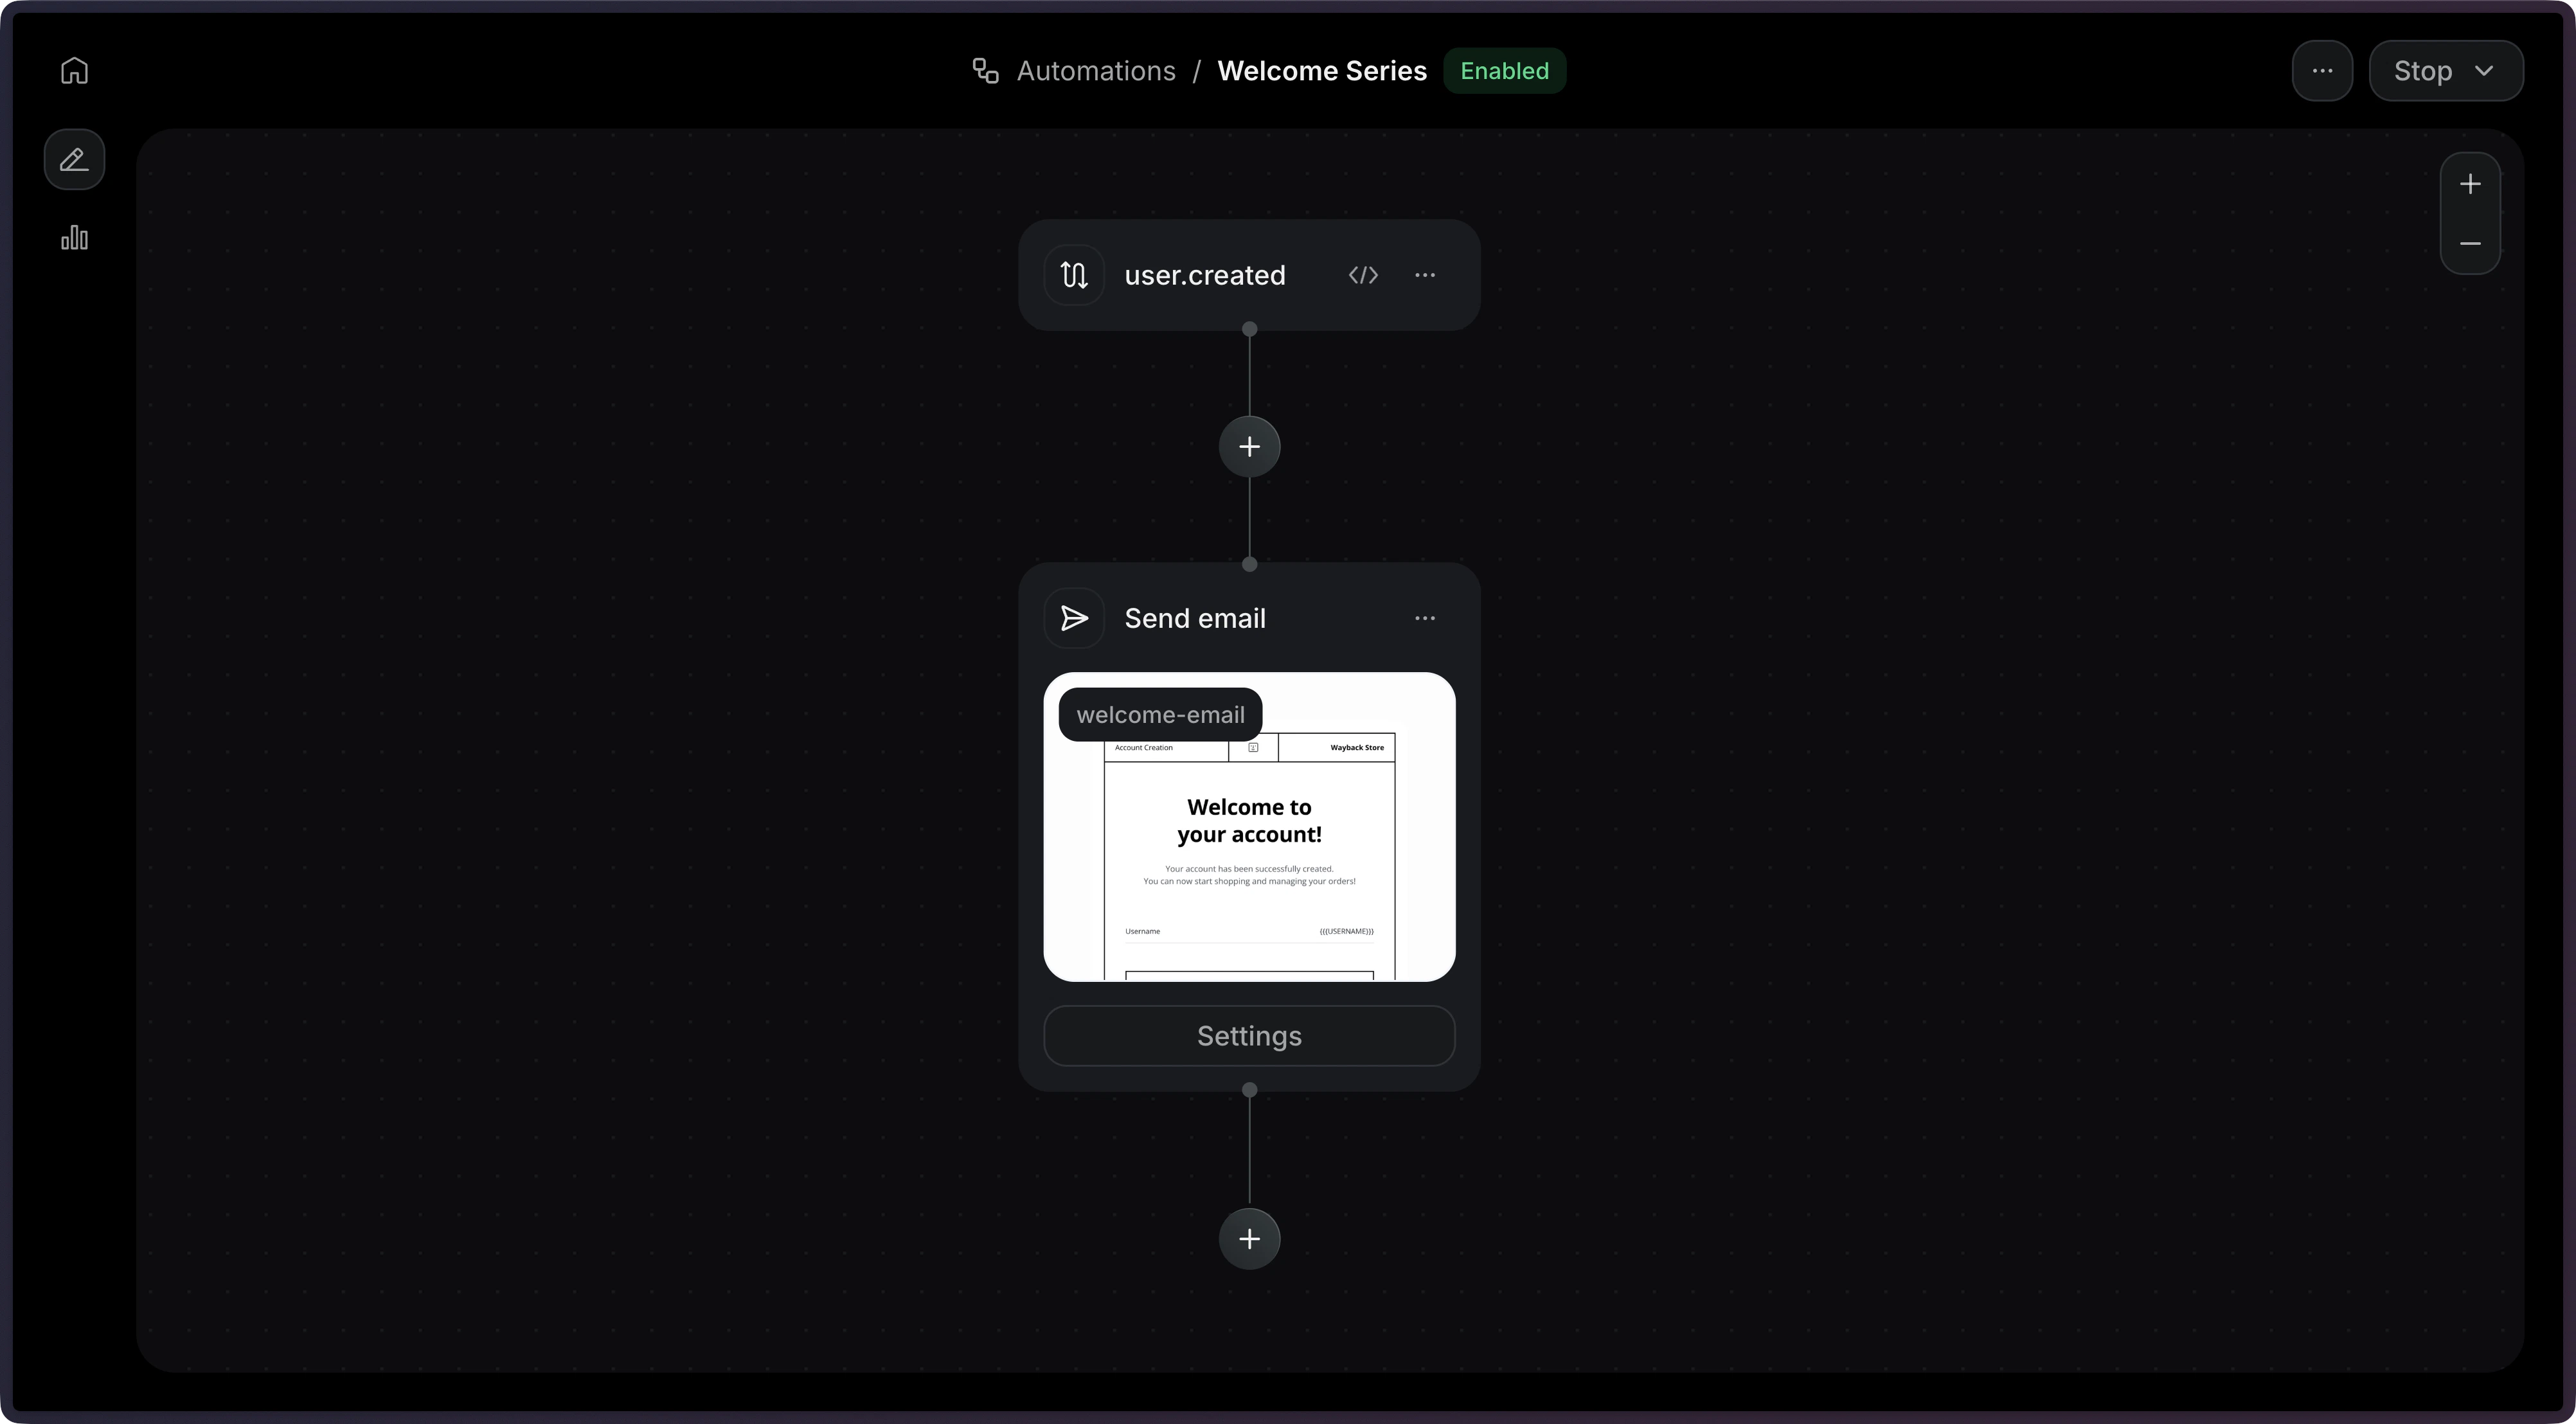
A trigger is the first step that will run when the Automation is executed. Add Trigger to Automation In this example, we will receive an event called user.created as a trigger. Add Custom Event See the Trigger documentation for more details.

3. Define Steps

Now, we need to define the steps that will be executed. There are several step types you can add to your Automation:
Step typeDescription
ConditionBranches the workflow based on rules
DelayPauses execution for a specified duration
Wait for EventPauses execution until a specific event is received
Send EmailSends an email using a template
Contact UpdateUpdates a contact’s fields
Contact DeleteDeletes the contact
Add to SegmentAdds the contact to a segment
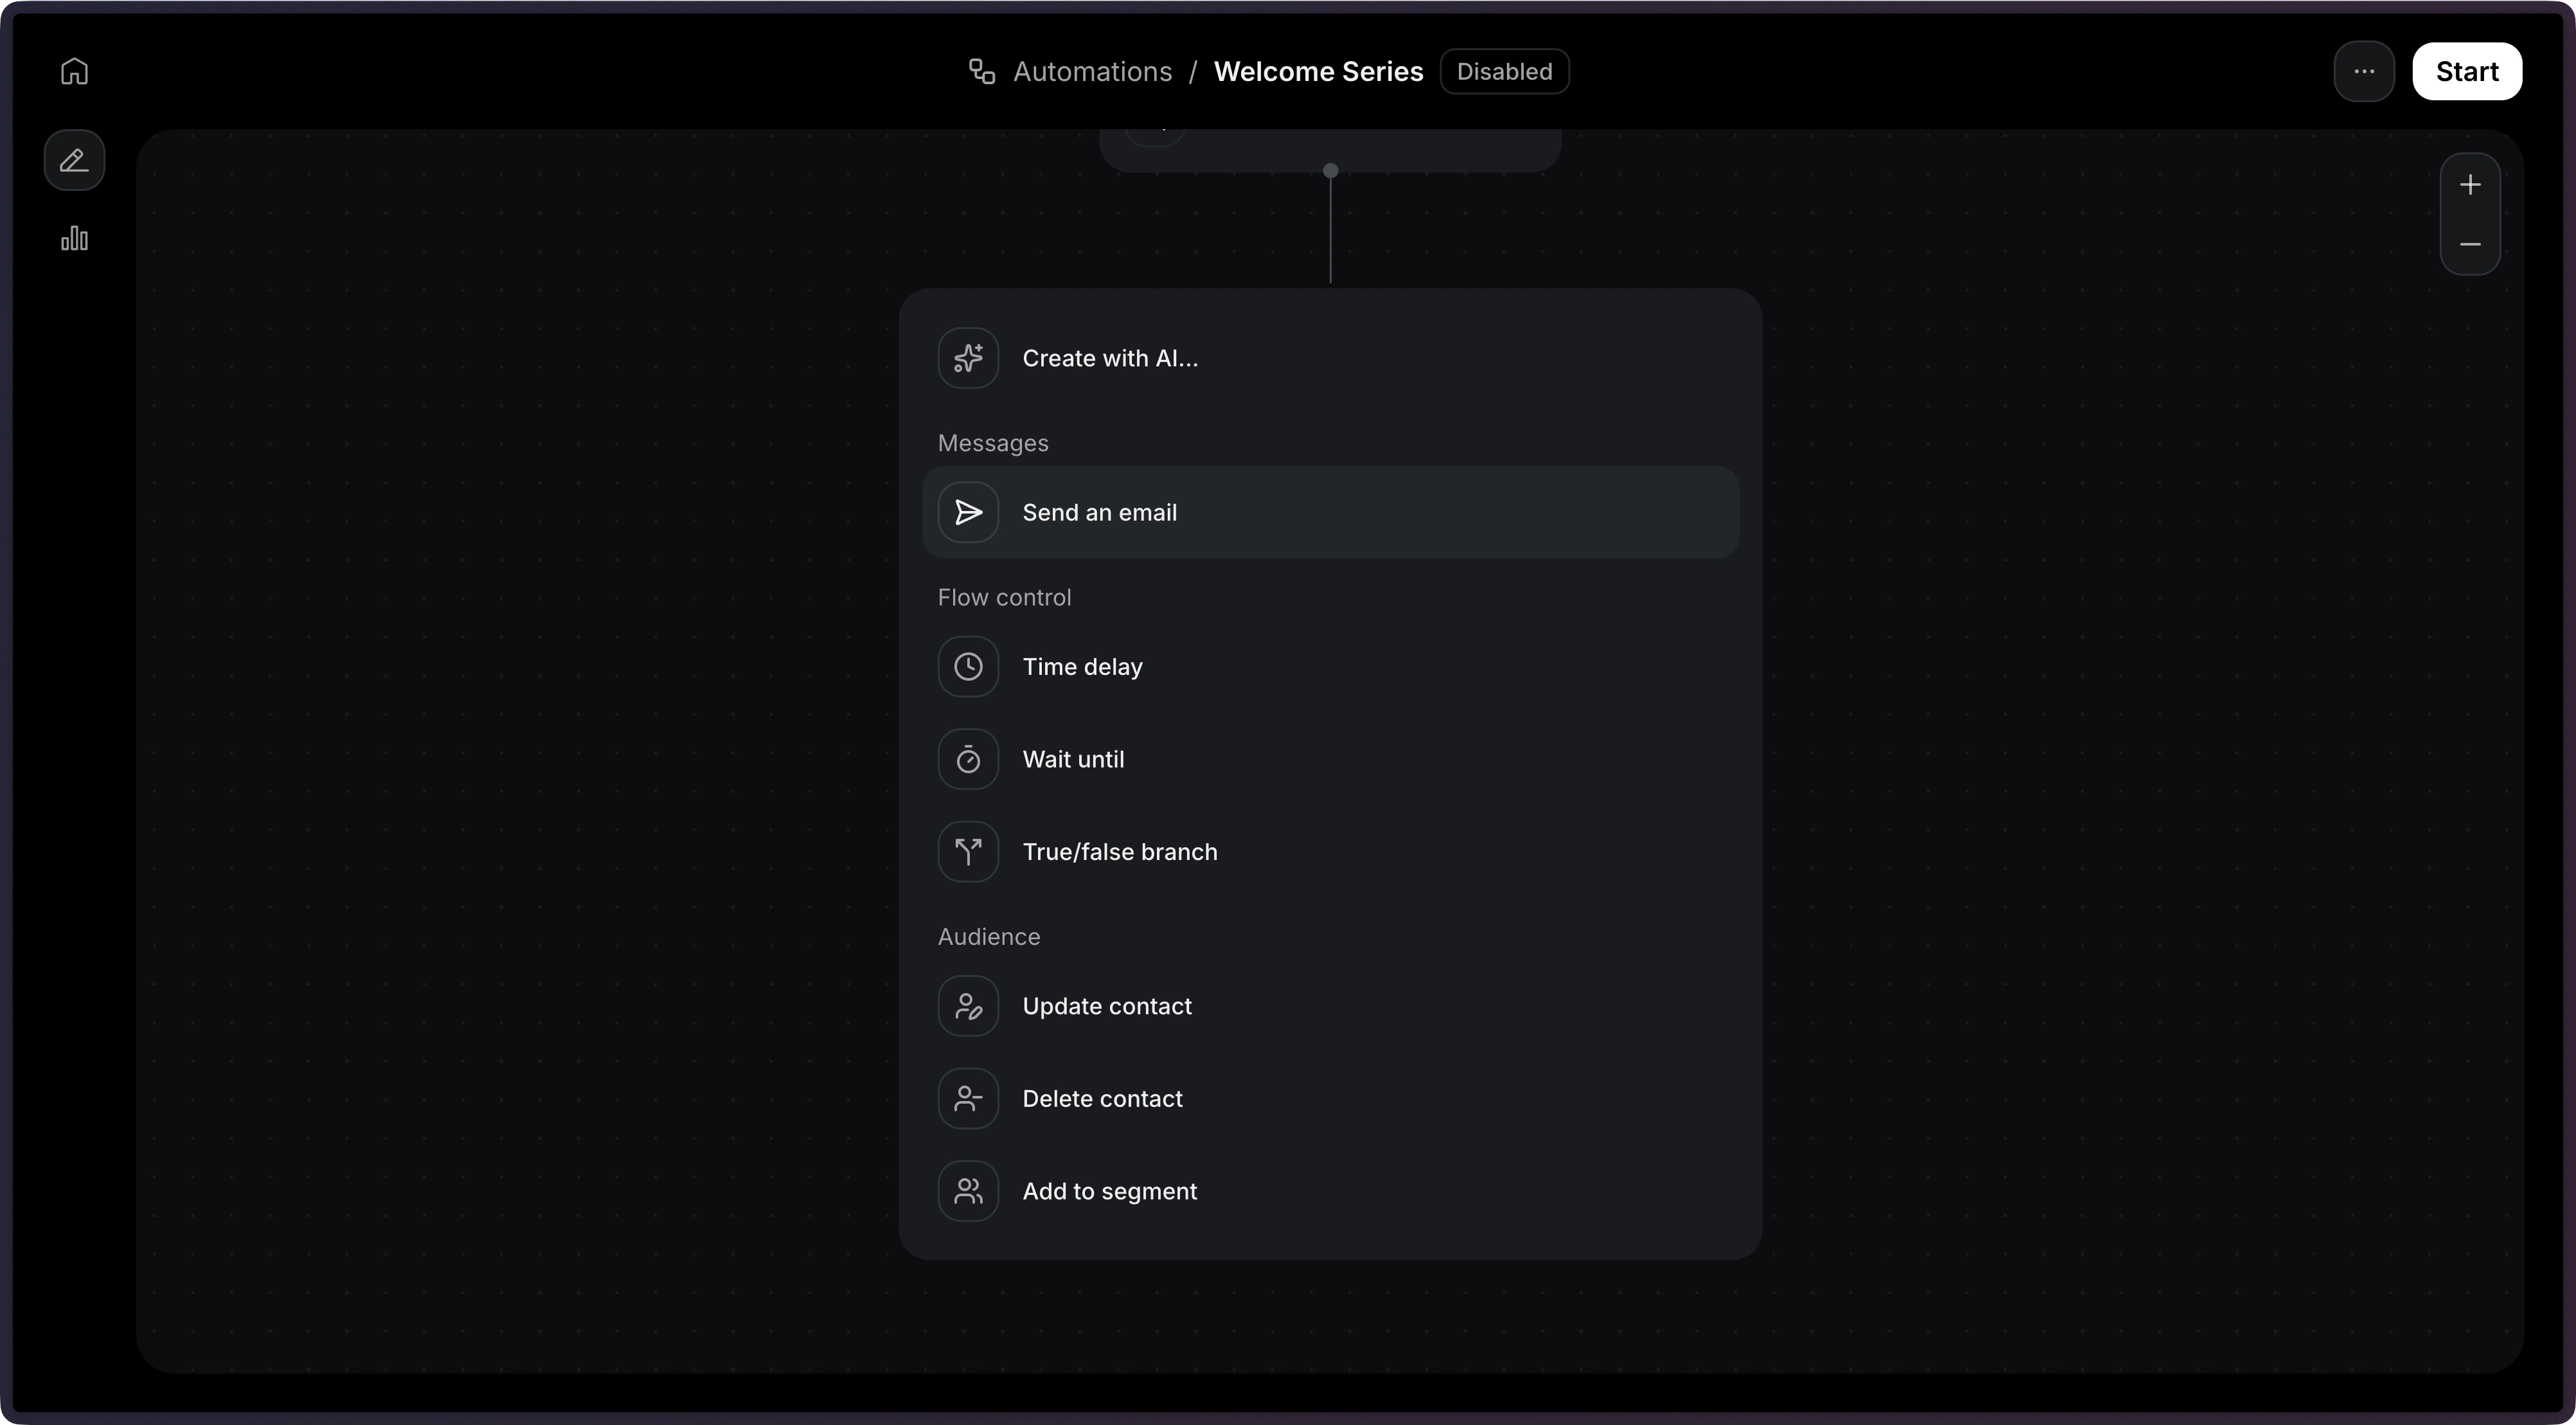
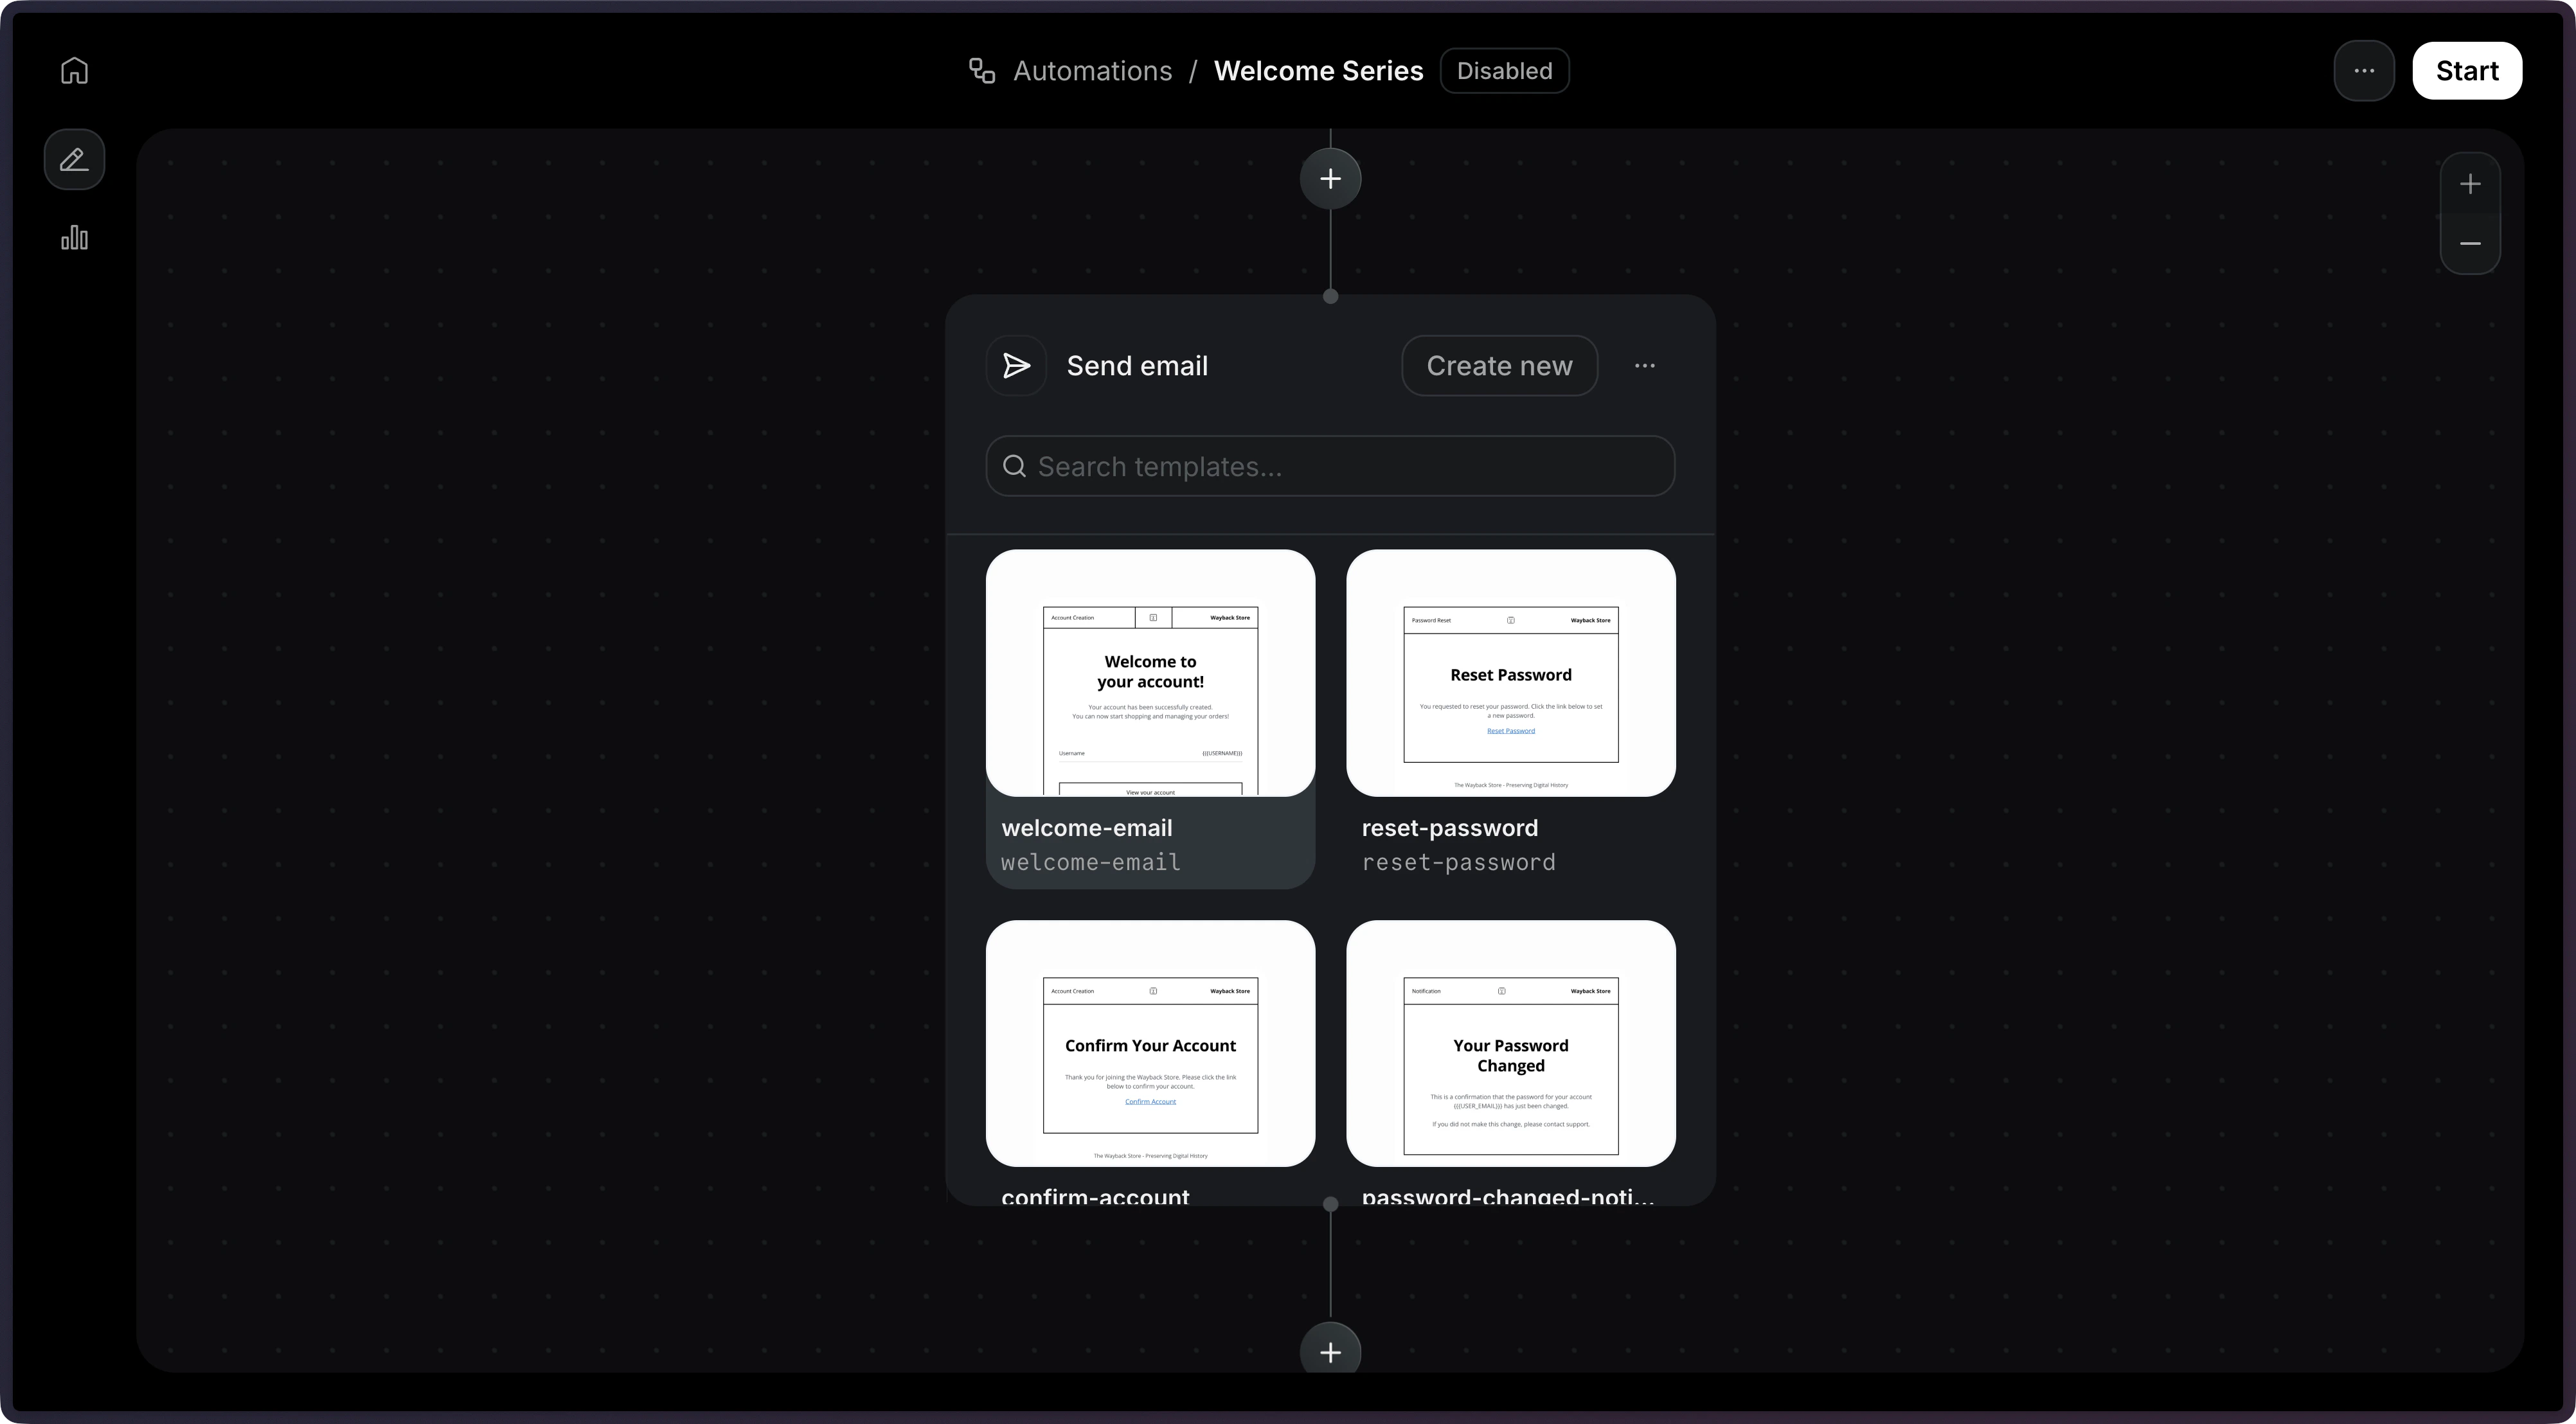
On this example, we will use the Send Email step. Define Steps Once you select that step, you will be able to select an existing template.
Note: Only published templates are available to be used in an Automation.
Add Send Email Step 
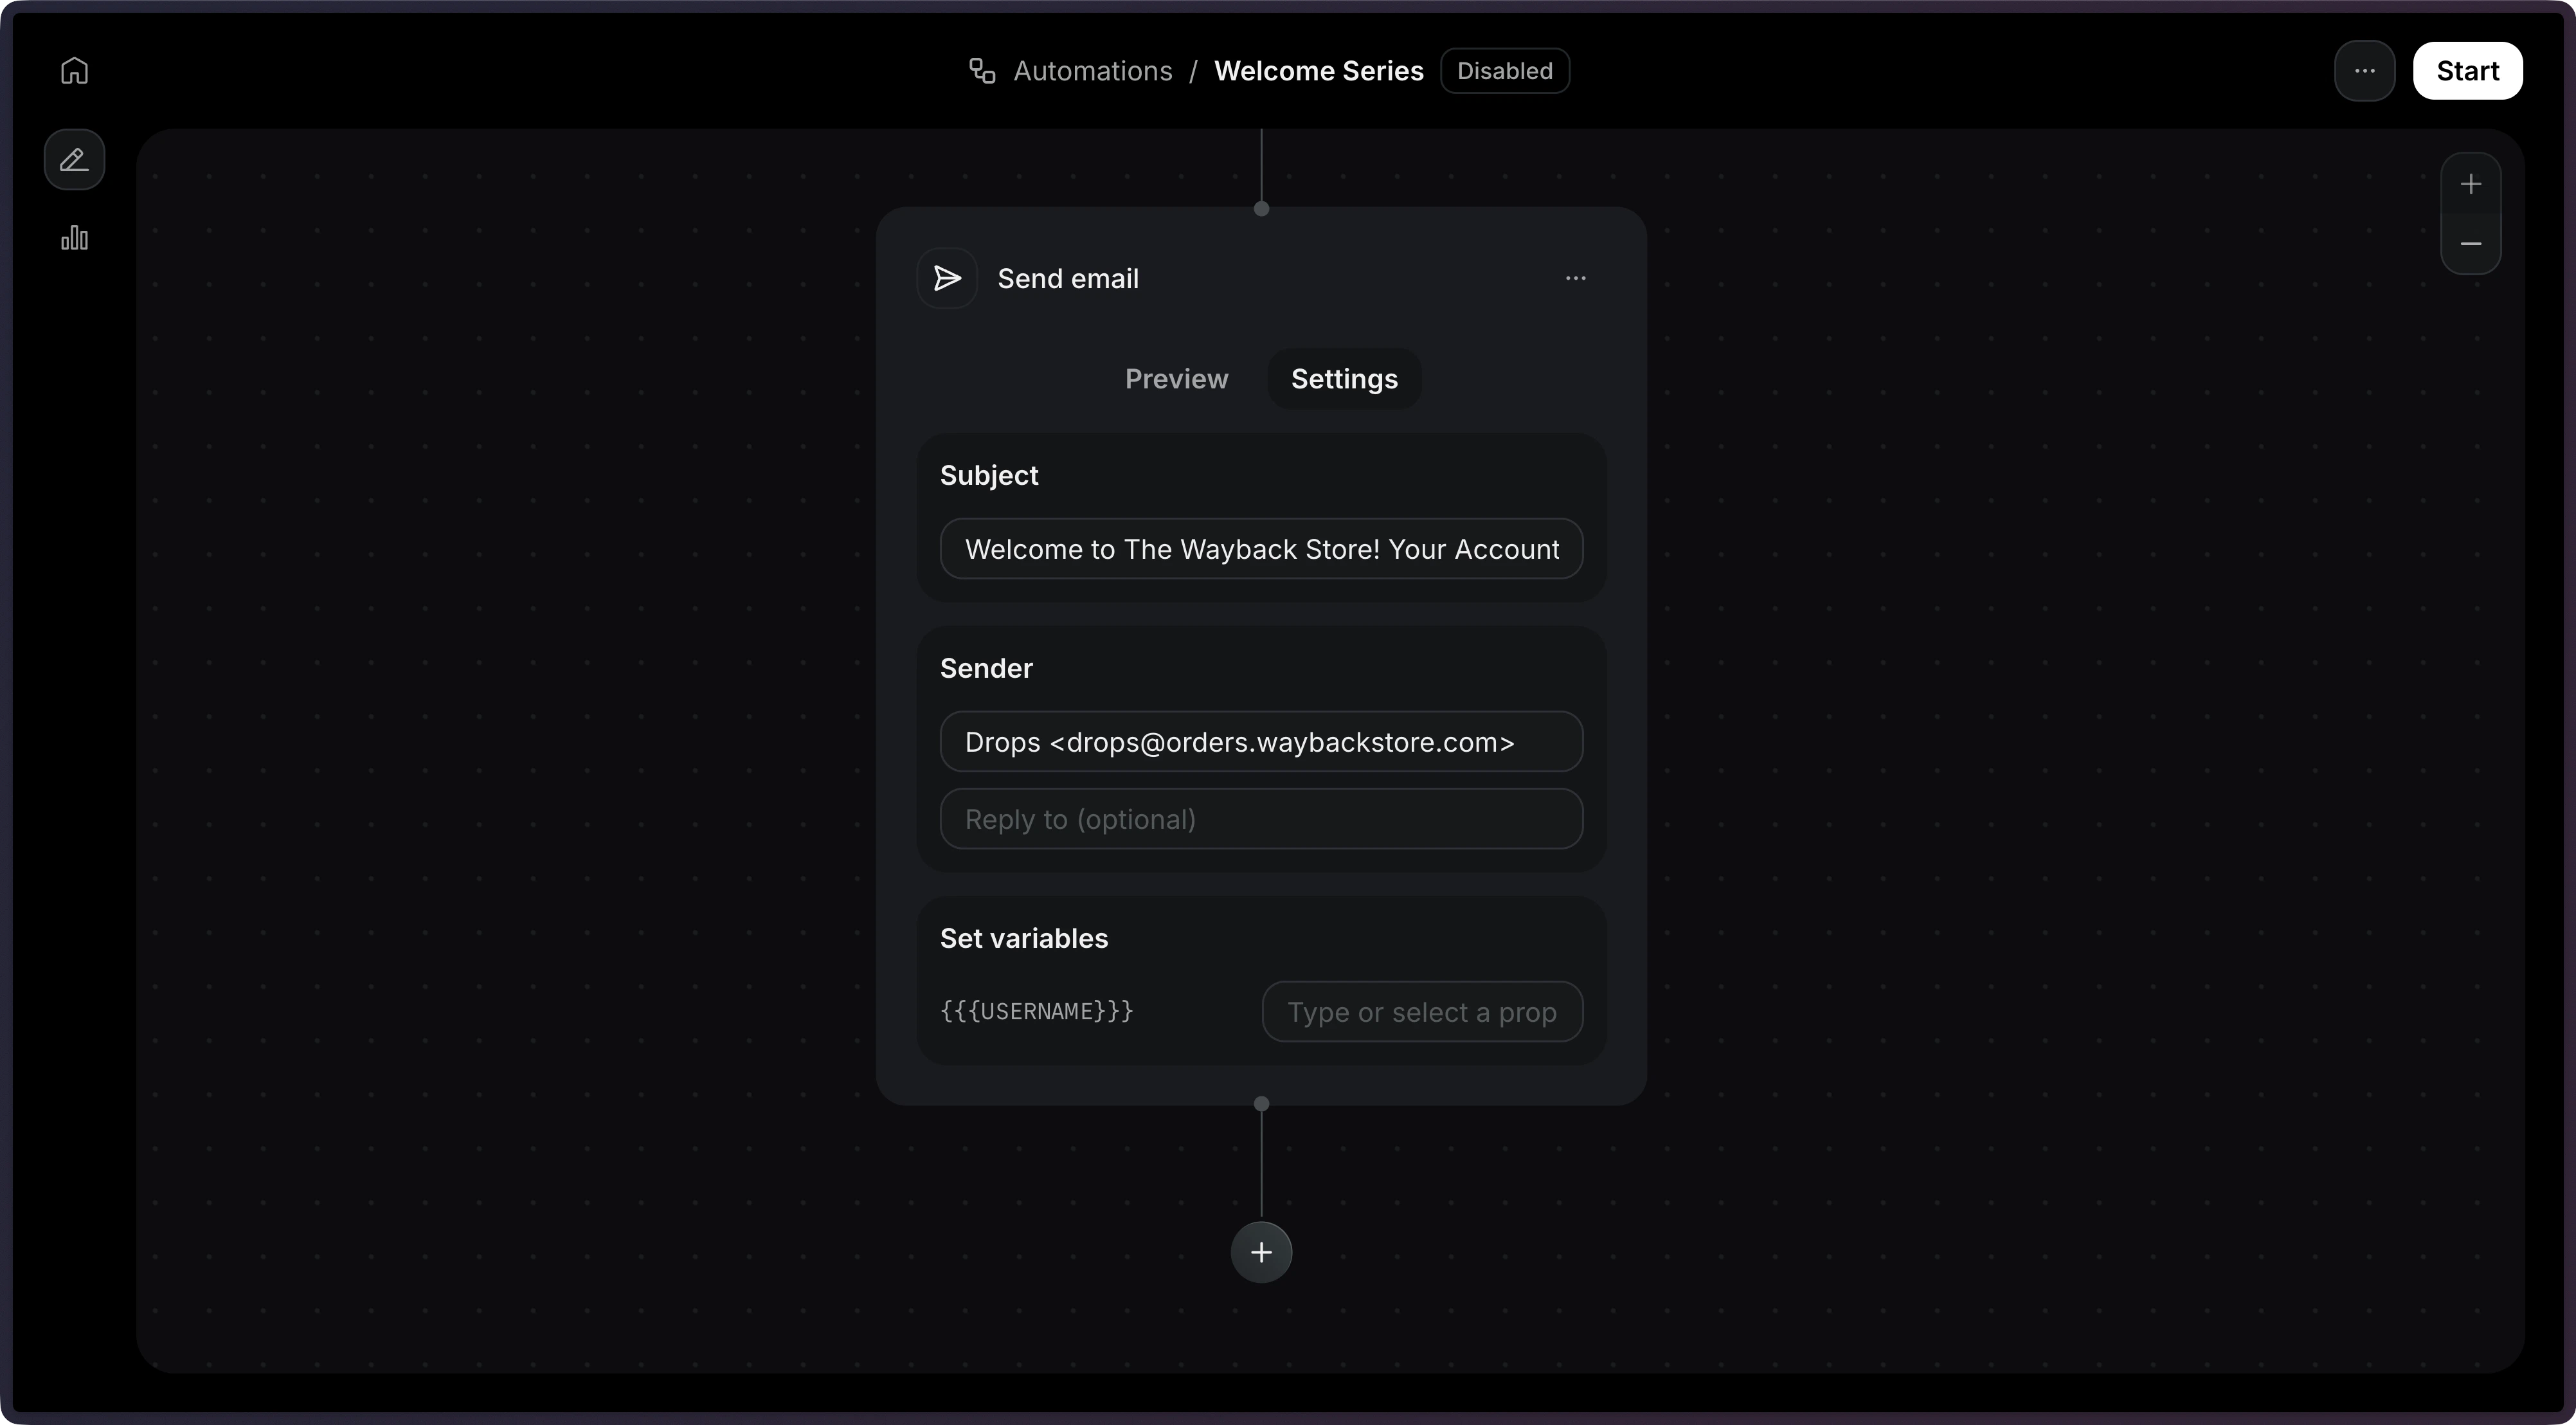
With the template selected, you will be able to configure the email subject and sender address. Send Email Step Settings Once you’re done with the email, you can click on Start to enable the Automation. Automation Enabled

4. Send an Event

Now, we’re ready to send an event to trigger the Automation. On your application, you can send an event to trigger the Automation by using the API.
import { Resend } from 'resend';

const resend = new Resend('re_xxxxxxxxx');

// Trigger with a contact ID
const { data, error } = await resend.events.send({
  event: 'user.created',
  contactId: '7f2e4a3b-dfbc-4e9a-8b2c-5f3a1d6e7c8b',
  payload: {
    plan: 'pro',
  },
});

// Trigger with an email address
const { data, error } = await resend.events.send({
  event: 'user.created',
  email: 'steve.wozniak@gmail.com',
  payload: {
    plan: 'pro',
  },
});
View the API reference for more details.

5. Monitor Runs

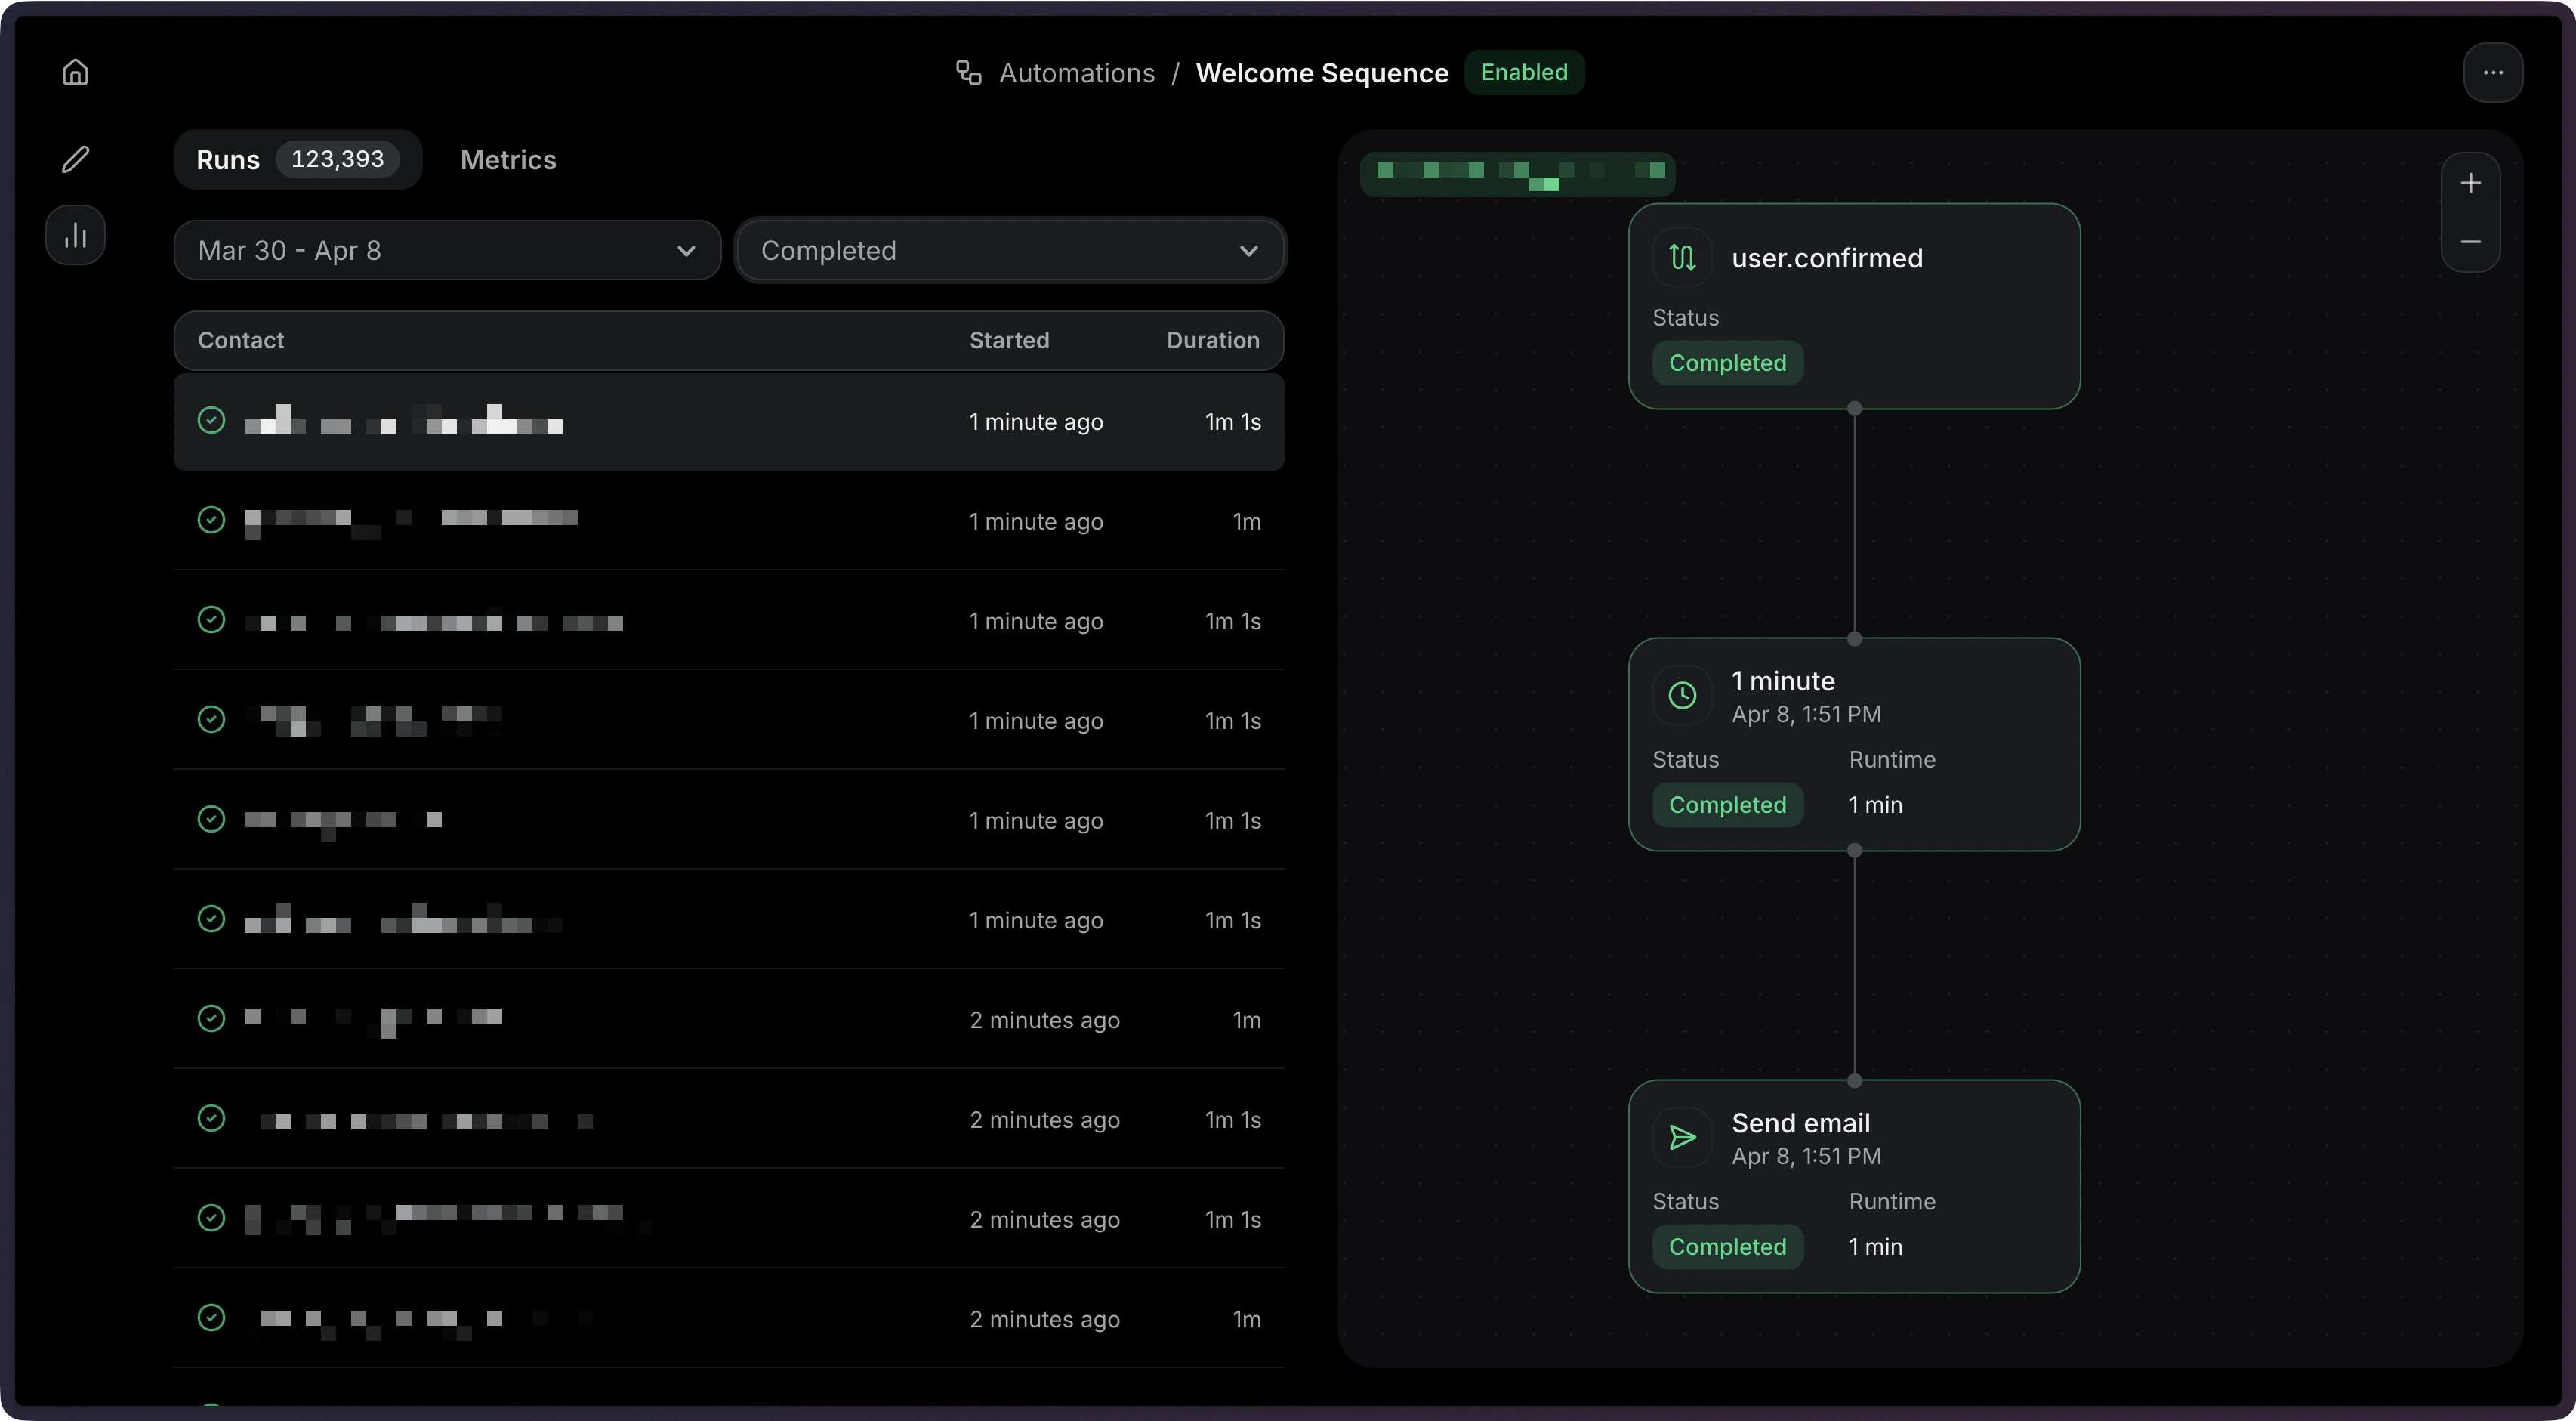
After sending events, you can monitor your Automation executions through Runs. Each time an event triggers an Automation, a Run is created to track the execution. Monitor Runs Learn how to:
  • View Run statuses and execution details
  • Filter Runs by status (running, completed, failed, cancelled)
  • Debug failed Runs with step-level error information
  • Stop Automation Runs when needed
See the Runs documentation for more details.